This page discusses how to use ASP.NET C# programs to manage Microsoft Access databases.
- Microsoft keeps updating its products and each version is slightly different from its previous version. The instructor is tired of updating his slides to keep up with Microsoft, but you should be able to tell the differences.
- The Visual Studio 2019 in the classroom CEC205 only accepts 2000 or 2002-2003 Access database format
.mdb. The.accdbformat will crash the VS. Make sure that you use the.mdbformat in case you will use the CEC205 to demonstrate your exercises.
   Start ⇒ All Programs
         ⇒ Visual Studio 2019
C:\ASP.NET-workspace\WebSite7\ .
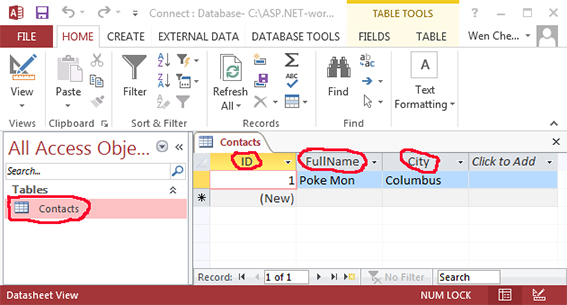
C:\ASP.NET-workspace\WebSite7\WebSite7\Access\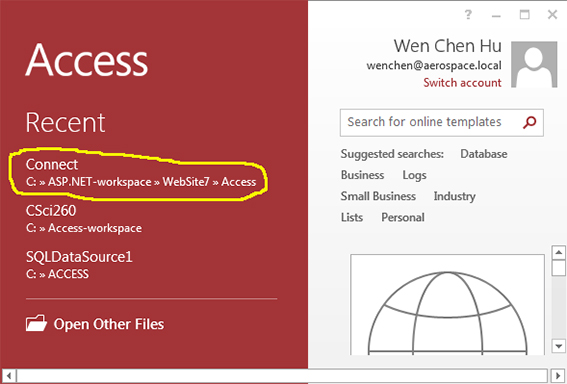
Default.aspx and Result.aspx, as follows:
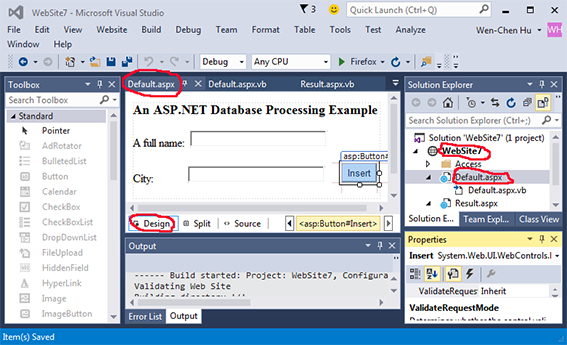
Default.aspx.cs is given as follows:
 using System;
 using System.Data.OleDb;

 public partial class _Default : System.Web.UI.Page {
  protected void Insert_Click( Object sender, EventArgs e ) {
   String connString = "Provider=Microsoft.ACE.OleDb.12.0;Data Source=" +
     Server.MapPath( "Access\\Connect.accdb" );
   OleDbConnection conn = new OleDbConnection( connString );
   String sql = "INSERT INTO Contacts( FullName, City ) VALUES( @FullName, @City )";
   OleDbCommand cmd = new OleDbCommand( sql, conn );
   cmd.Parameters.AddWithValue( "@FullName", FullName.Text );
   cmd.Parameters.AddWithValue( "@City", City.Text );
   conn.Open( );
   cmd.ExecuteNonQuery( );
   conn.Close( );
   cmd.Dispose( );
   Response.Redirect( "Result.aspx" );
  }
 }
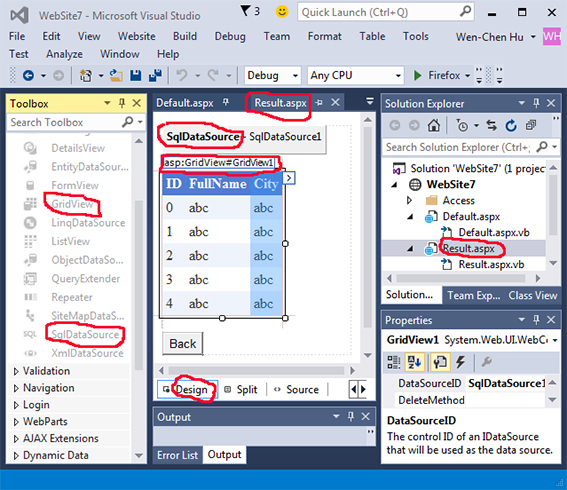
Result.aspx.cs is given as follows:
 using System;

 public partial class Result : System.Web.UI.Page {
  protected void Back_Click( Object sender, EventArgs e ) {
   Response.Redirect( "Default.aspx" );
  }
 }
Build ⇒ Build Web SiteIf the build is successful, close the Access and debug the web site by selecting the options:
Debug ⇒ Start Without Debugging
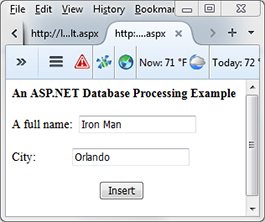
Default.aspx | ⇒ Insert ⇐ Back |
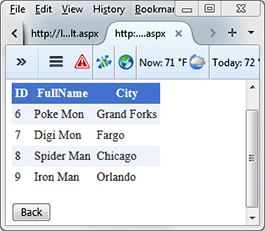
Result.aspx |
   File ⇒ Open
        ⇒ Project/Solution...
        ⇒ Open (C:\ASP.NET-workspace\WebSite7\WebSite7.sln)
